

How To Create An Email Group In Outlook 2007
(Archives) Microsoft Outlook 2007: Working with Distribution Lists
Last updated
This article is based on legacy software.
Distribution lists contain email addresses for more than one person. Generally the people are related in some way, such as committee members or work groups. Distribution lists can combine email addresses for individuals, existing lists from UW-Eau Claire, and non-campus users.
Creating Distribution Lists
You can add members to a distribution list by selecting them from the campus directory or by typing their information. You can include existing campus distribution lists in your distribution list.
-
From the Navigation pane, click CONTACTS

-
Click the
 next to NEW » select Distribution List
OR
From the Actions menu, select New Distribution List
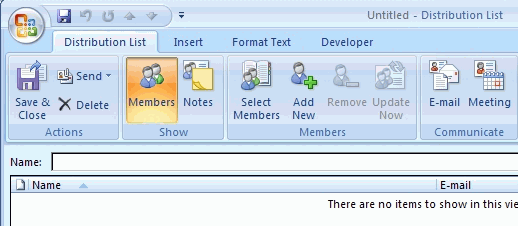
An Untitled Distribution List window appears.
-
In the Name text box, type a name for the list
- To add members from the UW-Eau Claire directory:
- Click SELECT MEMBERS

The Select Members: Global Address List dialog box appears. - From the Address Book pull-down list, select Global Address List
- In the Search text box, type the name or select it from the scroll box
HINTS:
You can select an existing list as a member of your distribution list.
Typing the first few letters of the last name takes you to that part of the directory where you can easily select the name.

- Click MEMBERS
- Repeat steps c and d until you have made all of your selections from the directory
-
Click OK
- Click SELECT MEMBERS
- To add off-campus members:
- Click ADD NEW

- In the Display name text box, type the member's name
HINT: Members of the list are displayed alphabetically by the first character(s) of this field. You may want to use the format last name, first name - In the E-mail address text box, type the complete email address
- (Optional) If you would also like to create a Contact for this person, select Add to Contacts
For more information about creating Contacts, refer to Working with Contacts.

-
Click OK
- Click ADD NEW
-
Click SAVE & CLOSE
Using Copy and Paste to Add Members to a List
You can use copy and paste to easily create distribution lists from existing lists of email addresses. This is best used for lengthy lists where you do not want to copy and paste email addresses individually using Add New. For example, you can use an existing
- list of email addresses in Word
- list of email addresses in Excel
- email addresses in an email message you've received
NOTES:
The email addresses in your list should be separated by semicolons (;).
If you want the Display name to be the person's name, you will have to edit individual members of the list once it is created.
-
From the program or message where you have the list of email addresses, select the list
-
Copy the list by pressing [Ctrl] + [C]
-
In Outlook, from the Navigation pane, click CONTACTS

-
Click the
 next to NEW, from the pull-down list, select Distribution List
 -
In the Name text box, type a name for the list
-
Click SELECT MEMBERS

The Select Members dialog box appears. -
In the Members text box, paste the email addresses by pressing [Ctrl] + [V]
-
Verify that the addresses are separated by semicolons (;)
-
Click OK
The email addresses appear in both the Name and the Email columns. -
(Optional) To change the Display name to the person's name, modify the information for that member
See Modifying Distribution List Entries below. -
Click SAVE & CLOSE
Modifying Distribution List Entries
If you need to make adjustments to a Distribution List, you can easily do so. Simply open the Distribution List and make the desired adjustments.
-
From the Navigation pane, click CONTACTS

-
Double click the desired Distribution List
The Distribution List dialog box appears. - To modify the information for an individual member:
- Double click the member's name
The E-mail Properties dialog box appears.

- Make the desired changes
-
Click OK
- Double click the member's name
-
To add additional members, click SELECT MEMBERS
 or ADD NEW
-
To remove members, select the member's name and click REMOVE

-
When complete, click SAVE & CLOSE
Deleting Distribution Lists
If you no longer need a Distribution List, you can delete the list by any of the following methods:
Deleting Distribution Lists: Menu Option
-
From the Navigation pane, click CONTACTS

-
Select the Distribution List to be deleted
-
From the Edit menu, select Delete
Deleting Distribution Lists: Keyboard Option
-
From the Navigation pane, click CONTACTS

-
Select the Distribution List to be deleted
-
Press [Shift]+[Delete]
A confirmation dialog box appears. -
Click YES
Deleting Distribution Lists: Quick Menu Option
-
From the Navigation pane, click CONTACTS

-
Right click the Distribution List to be deleted » select Delete
Sending Messages to a Distribution List
Sending a message to a Distribution List is very similar to sending a message to a Contact.
Sending Messages to a Distribution List: Toolbar Option
-
From the Navigation pane, click CONTACTS

-
Select the Distribution List that you want to send a message to
-
From the Standard toolbar, click NEW MESSAGE TO CONTACT

Sending Messages to a Distribution List: Quick Menu Option
-
From the Navigation pane, click CONTACTS

-
Right click the Distribution List you want to send to » select Create » New Message to Contact
Was this article helpful? Yes No
View / Print PDFHow To Create An Email Group In Outlook 2007
Source: https://www.uwec.edu/kb/article/microsoft-outlook-2007-working-with-distribution-lists/
Posted by: brownstered.blogspot.com
0 Response to "How To Create An Email Group In Outlook 2007"
Post a Comment